


Fresh Milled Artisan Sourdough Guide
A comprehensive guide to home milling, The History of Flour in America, and a Step by Step Video to Making Fluffy, Nourishing Freshly Milled Artisan Sourdough Bread

Combining the nourishment of freshly milled flour and the art of sourdough bread making.
Freshly Milled Sourdough: The Journey
I have been making sourdough bread for over a decade, but my love of bread and fresh milled grains goes all the way back to the early years of my childhood. I remember watching my grandma mill her own grain for her famous dinner rolls. The aroma of fresh milled wheat still takes me back to her kitchen and watching her hands knead the dough. Years later, my mom purchased a Vitamix and started milling wheat with it. She made, and still makes, the most amazing fresh milled cinnamon rolls. The flavor is unmatched. I knew that milling my own wheat would result in a more nutritious bread for my family, and paired with sourdough, it sounded like the holy grail of healthy bread. But after months and years of many dense, gummy loaves, I was feeling disappointed and deflated (literally) after almost every bake.
Does bread need to look beautiful in order to taste good? It doesn’t. But there is something about the results being both beautiful and delicious that create motivation and inspiration to continue baking. I found I could get both beauty and flavor by adding a small amount of freshly milled flour to my white flour sourdough, so that was my method for many years, even as I began to teach workshops. The results of bread made with white flour are very consistent, predictable, and easy to teach. My grain mill sat on my counter all of those years, only milling a small percentage of the flour our family was consuming. I got to a point during “the great flour shortage of 2020” when I dove back into fresh milled sourdough and learned more about how differently it performs in comparison with store bought sifted white flour. After many more months of trial, error, and patience I began to slowly put the pieces together. I have finally found a method that results in both beauty and flavor.
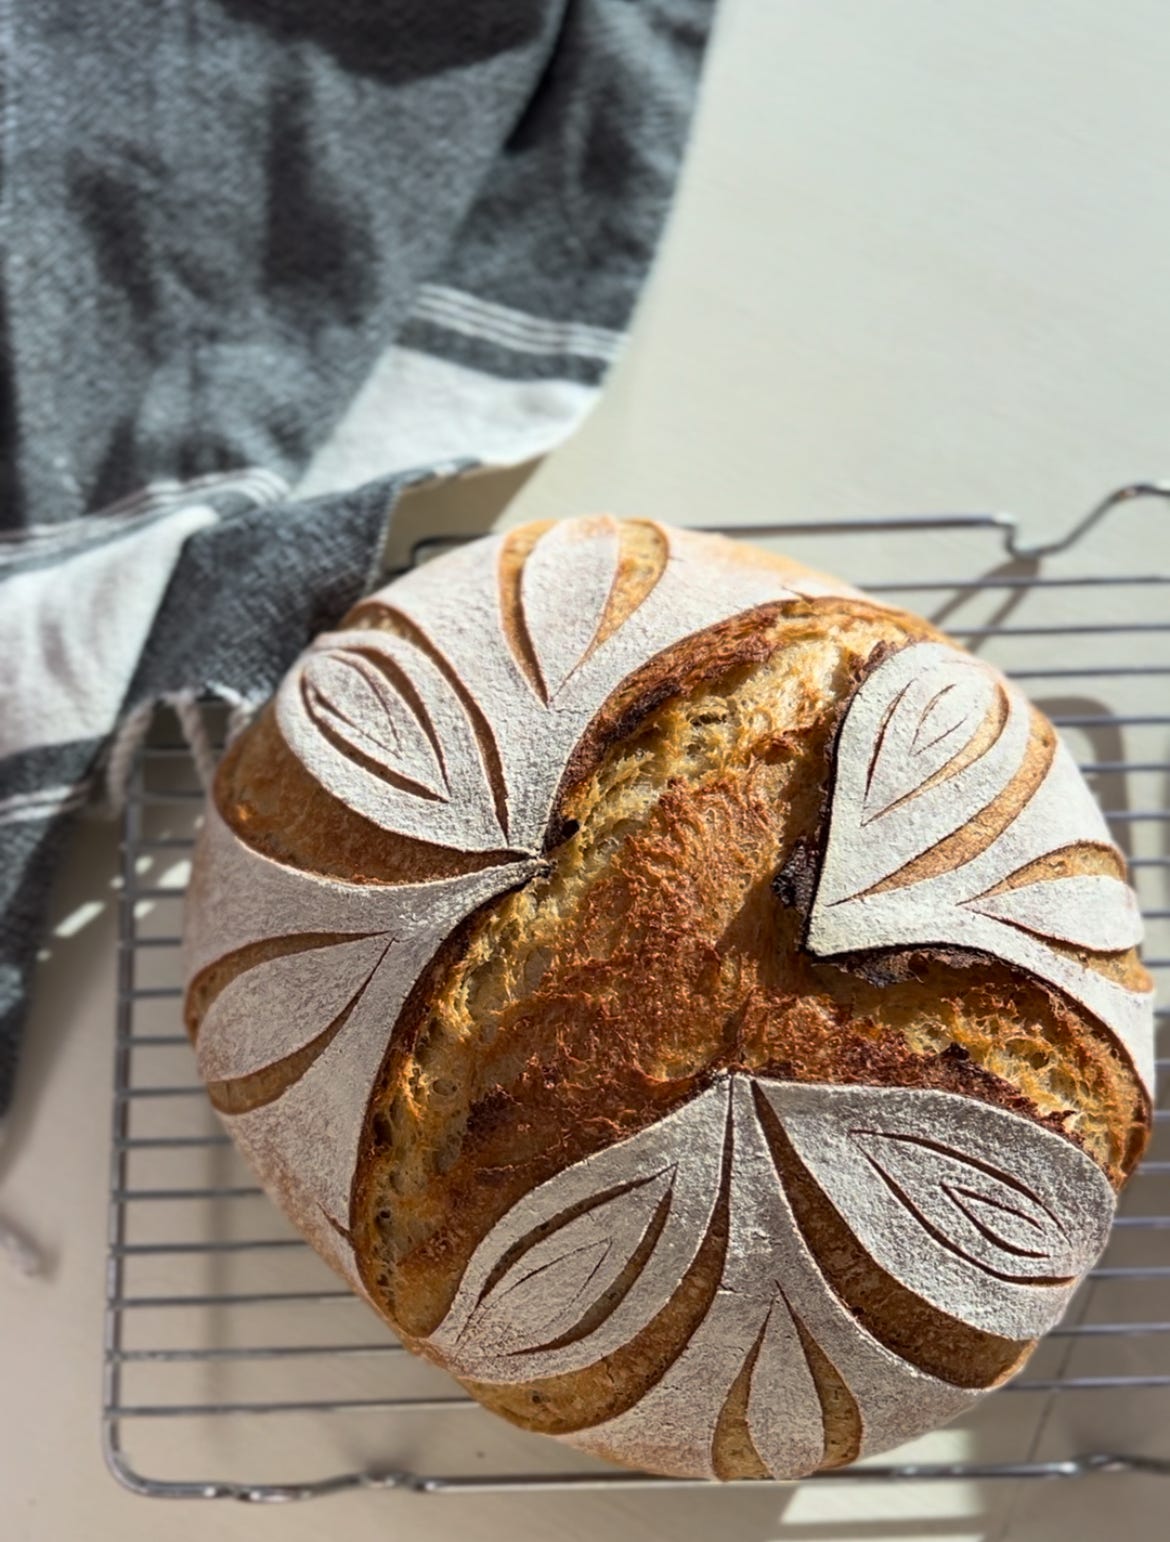
I introduce to you: fluffy freshly milled artisan sourdough bread.
Let’s talk about some of the benefits of fresh milled flour, then we will hop into the method of making this beautiful and delicious bread.
Why Fresh Milled?
A Quick History of Milling
Purchasing and Storing Grain
Purchasing a Home Mill
The Method
Why Fresh Milled?
Fresh milled flour contains 40 of the 44 nutrients considered essential to sustain human life. When you use the whole grain without sifting out any of the components, your bread is going to be loaded with vitamins, minerals, protein, carbohydrates, and healthy fats. When I started eating fresh milled sourdough, my body began craving it.
Flour starts out as a grain, or wheat berry. It has three components once the chaff is removed: the bran, endosperm (starch), and germ. Commercial milling sifts out all but the endosperm, which is what becomes store bought white flour.
The oils contained in the bran and germ cause the flour to go rancid faster. That’s why store bought flour can last a very long time just sitting out at room temperature, while fresh milled flour should be used as soon as possible after it’s milled.
Growing Wheat
Over time, grain crops have been hybridized to prioritize both a proficient harvest, and disease resistance. Conventional wheat is treated with fertilizer and sprayed with pesticides, which end up in the flour after it’s been milled.
There are many farmers across the world keeping heirloom varieties of wheat alive through regenerative agriculture. The flavor and nutritional benefits of these wheat varieties are superior.
The climate and conditions of the region the wheat is grown in play a part in how the flour performs during baking as well. A hard red wheat that is dry farmed in Arizona will require more hydration than the same hard red wheat variety grown in the humid Mid-Atlantic region.
A Quick History of Milling
In ancient times, it was commonplace to mill your grain into flour just before baking. Most towns had a community mill where fresh milled flour was purchased.
In the late 1800’s, roller milling was introduced. These mills could mill faster, were less expensive to operate, and were able to efficiently sift the bran and germ out of the flour, which made it shelf stable. What happened to the bran and germ? It was sold as a by-product to the animal feed industry.
As humans started consuming white flour, large nutritional gaps became evident in the early 1900’s. Anemia, B vitamin deficiencies, gastrointestinal irritation, mental illness, and skin issues were on the rise. The government mandated flour enrichment in 1941. Enrichment is the process of adding some of the nutrients lost after sifting, back into the flour. Over 30 nutrients are lost through the sifting process and only a handful are added back in through enrichment.
To summarize: conventionally grown wheat is sprayed with pesticides, milled at high heat, sifted of all of the nutrients, and in some cases, bleached. It is then enriched with synthetic vitamins to be put on the grocery store shelf for human consumption. Wow.
Let’s talk about how simple it is to mill grain into nourishing freshly milled flour at home.
Purchasing and Storing Grain
It is best to find a reputable regional farmer or mill who sells their wheat berries in bulk. Wheat berries can be stored in food grade buckets with seals or sealed mylar bags.
I keep my wheat berries in food grade buckets next with easy open seals, right next to my mill, so I can access the grain easily when I am milling.
Purchasing a Home Mill
There are a few different types of home mills.
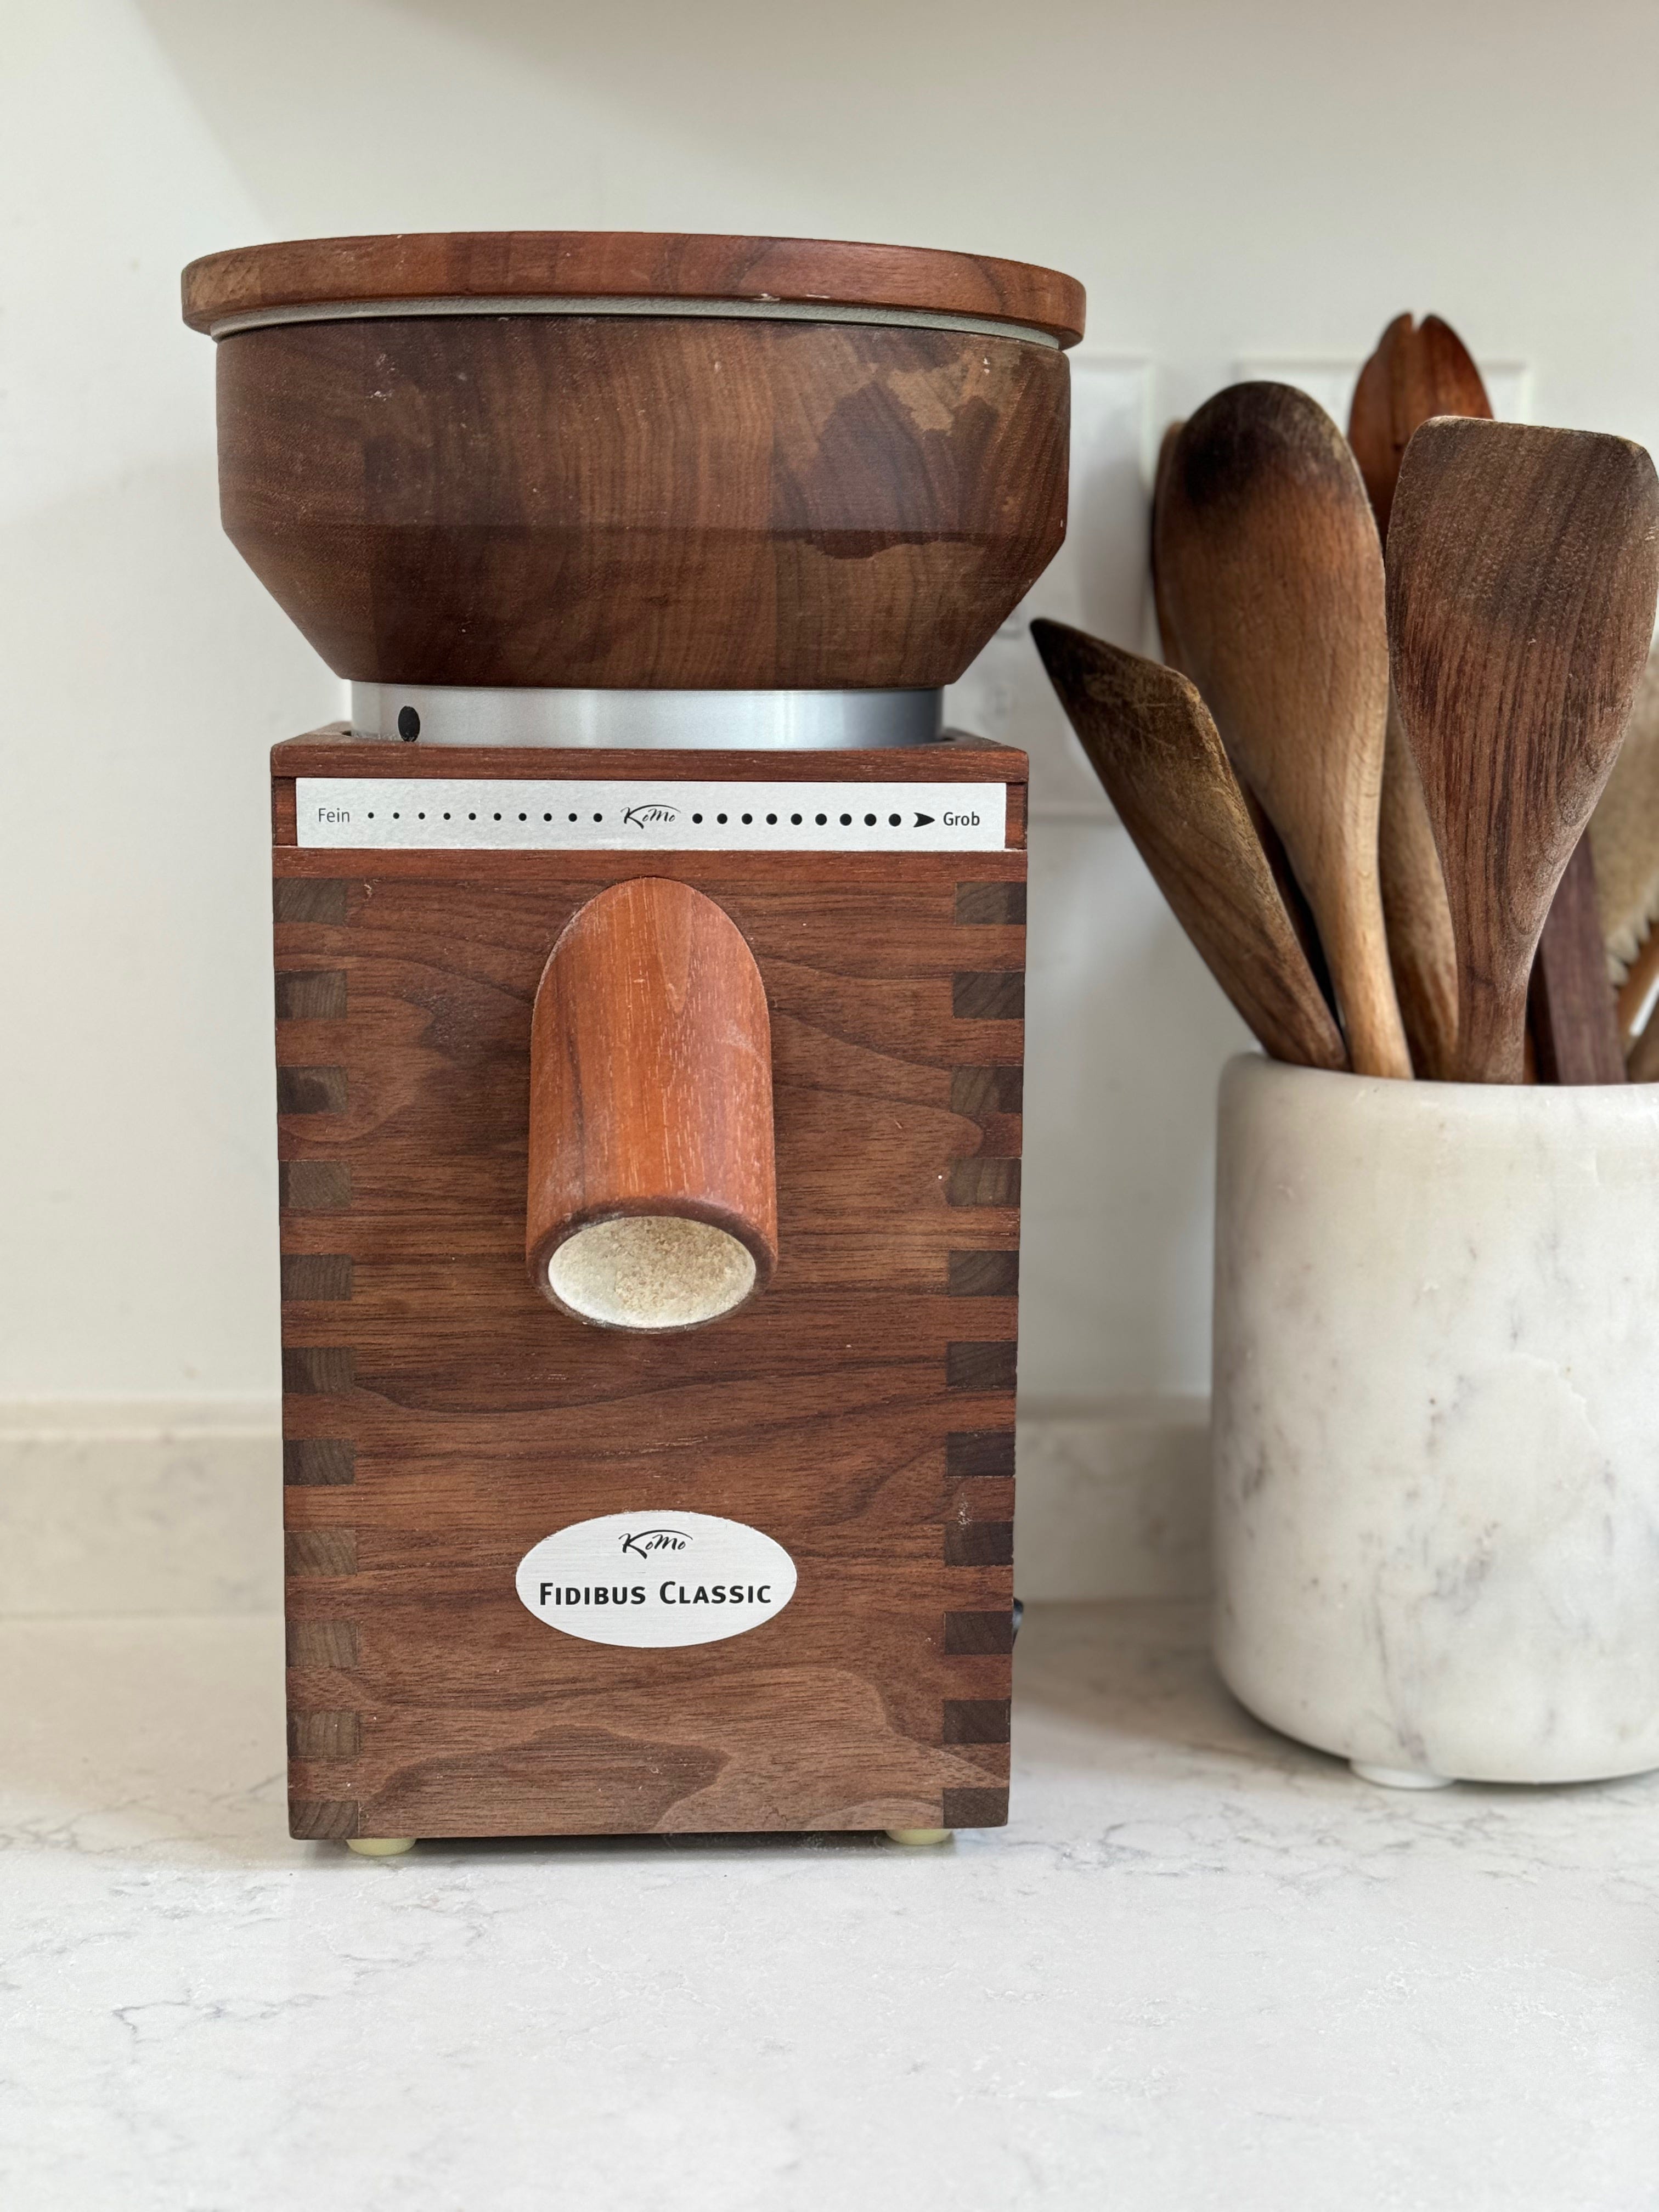
Stone burr mill, Komo Classic, Mockmill, or Nutrimill Harvest.
Stainless steel micronizing or impact grain mill, Nutrimill Classic
Steel burr mill, Country Living Grain Mill
When purchasing a home mill, it’s important to think about how often you see yourself milling. A micronizing or impact mill like the Nutrimill Classic or Wondermill is convenient because you can dump a large amount of wheat berries into the top chamber and it will mill all at once, very quickly, but it’s also not the most pretty appliance and it mills at a higher temperature.
A tabletop stone mill like the Komo mill, Nutrimill Harvest, or Mockmill is aesthetically beautiful, but can require a little more supervision during milling, as you may need to add grain to the hopper 2-3 times if you are milling a large of flour at a time. I don’t find this to be a problem at all. I find the stone burr mills to be the most high quality home mill you can purchase. It is potentially something you can pass down to your children.
Pleasant Hill Grain has a comprehensive chart comparing the features and specs of a wide selection of home mills.
Getting Started With Milling
Once you have a mill, some wheat berries, and a place to store them, you are ready to start milling flour and making bread and baked goods. It’s as easy as that.
Experiment with different varieties of wheat and find one you love. Select a hard wheat, such as hard white or hard red, for bread baking. The softer wheats like Sonora or Kamut are perfect for quick breads like pancakes and muffins.
Something you’ll notice right away, is that fresh milled flour smells earthy and sweet, which is quite a contrast to the sterile commercially milled flour from the grocery store.
Fresh Milled flour goes rancid very quickly. I recommend milling just before mixing your dough.
My favorite places to purchase mills and wheat berries can be found in the resources, at the end of this guide.
The Method: Fresh Milled Artisan Bread
I love marrying the nutritional powerhouse that is fresh milled flour with the natural leavening process of sourdough.
Maintaining a Sourdough Starter
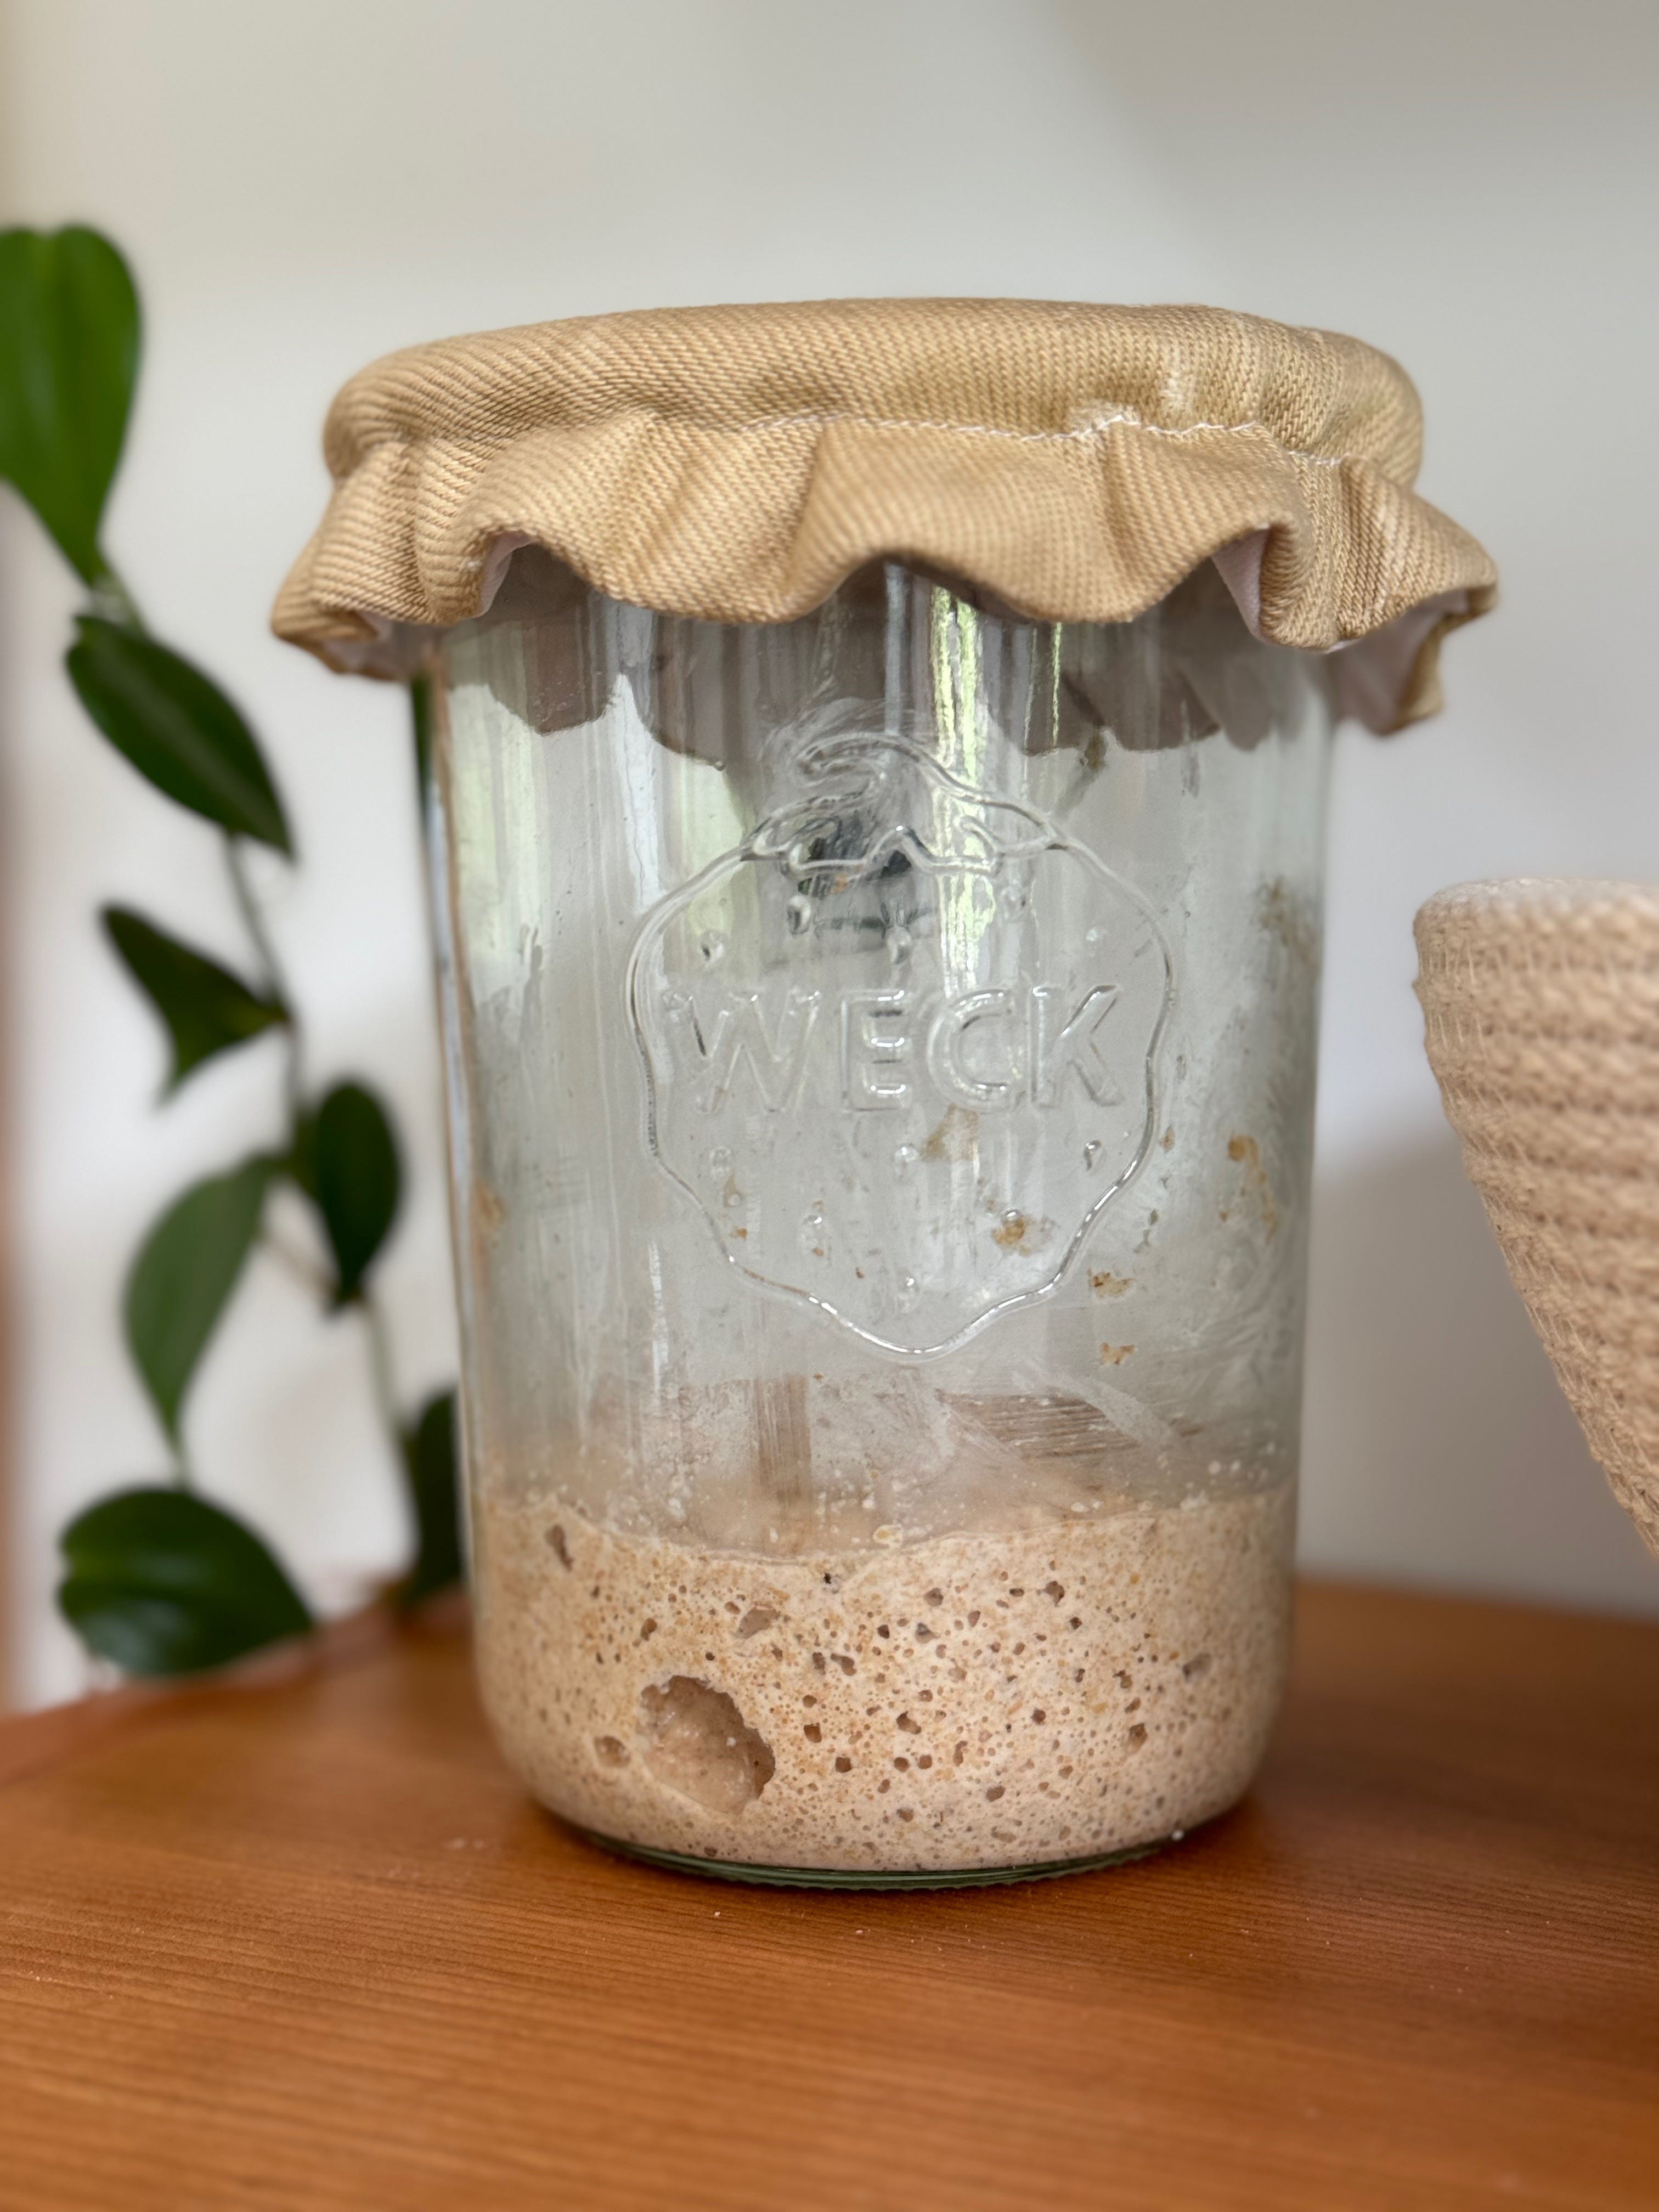
The heart of sourdough bread is your sourdough starter, or mother culture. A simple daily routine of feeding your starter takes just a couple of minutes and keeps the starter happy, healthy and ready to make bread. If you do not have a sourdough starter, you can start one from scratch, ask for some from a friend, or purchase a dehydrated starter online.
I mill enough flour needed to feed my starter for a week and keep it in the fridge in a glass container.
To feed your mother culture, scrape out 10 grams of sourdough starter into a jar (I like these jars best) and mix 30 grams of fresh milled flour, and 30 grams of water and stir thoroughly, incorporating lots of air as you stir. Set lid on top of jar (do not screw on). You can also use a coffee filter/cloth and rubber band. Or, my favorite, these jar covers. Sourdough needs air to thrive! It will peak when it’s bubbly and rises at least by double in the jar.
If you want to speed up the fermentation process, feed your starter equal ratios, 1:1:1. Example: 30 grams starter, 30 grams water, 30 grams flour.
If you want to feed your starter before bed and mix your dough in the morning, use a higher ratio feed. 1:10:10 : 10 grams starter, 100 grams flour, 100 grams water, it will take 10-12 hours to peak.
Compile discarded starter in a covered bowl or jar in the fridge and use for discard specific recipes.
On keeping your starter in the fridge
If you are baking less than once a week, I would recommend keeping your sourdough starter in the fridge and pulling it out a day or two before you are ready to bake. Feed the starter directly when you take it out of the fridge, and again in 6-12 hours, depending on feeding ratios.
On what type of flour to use to feed your starter
I use freshly milled hard white or hard red wheat flour to feed my sourdough starter. Keep in mind it will typically peak faster than white flour, but also hold over longer than white flour. Because of all the nutrients in the fresh milled flour, the starter will stay happier longer in between feeding.
I suggest a 1:5:5 or 1:10:10 feeding ratio, depending on how much starter you need for a recipe. Example: 10 grams starter, 50 grams flour, 50 grams water. Or 10 grams starter, 100 grams water, 100 grams flour.
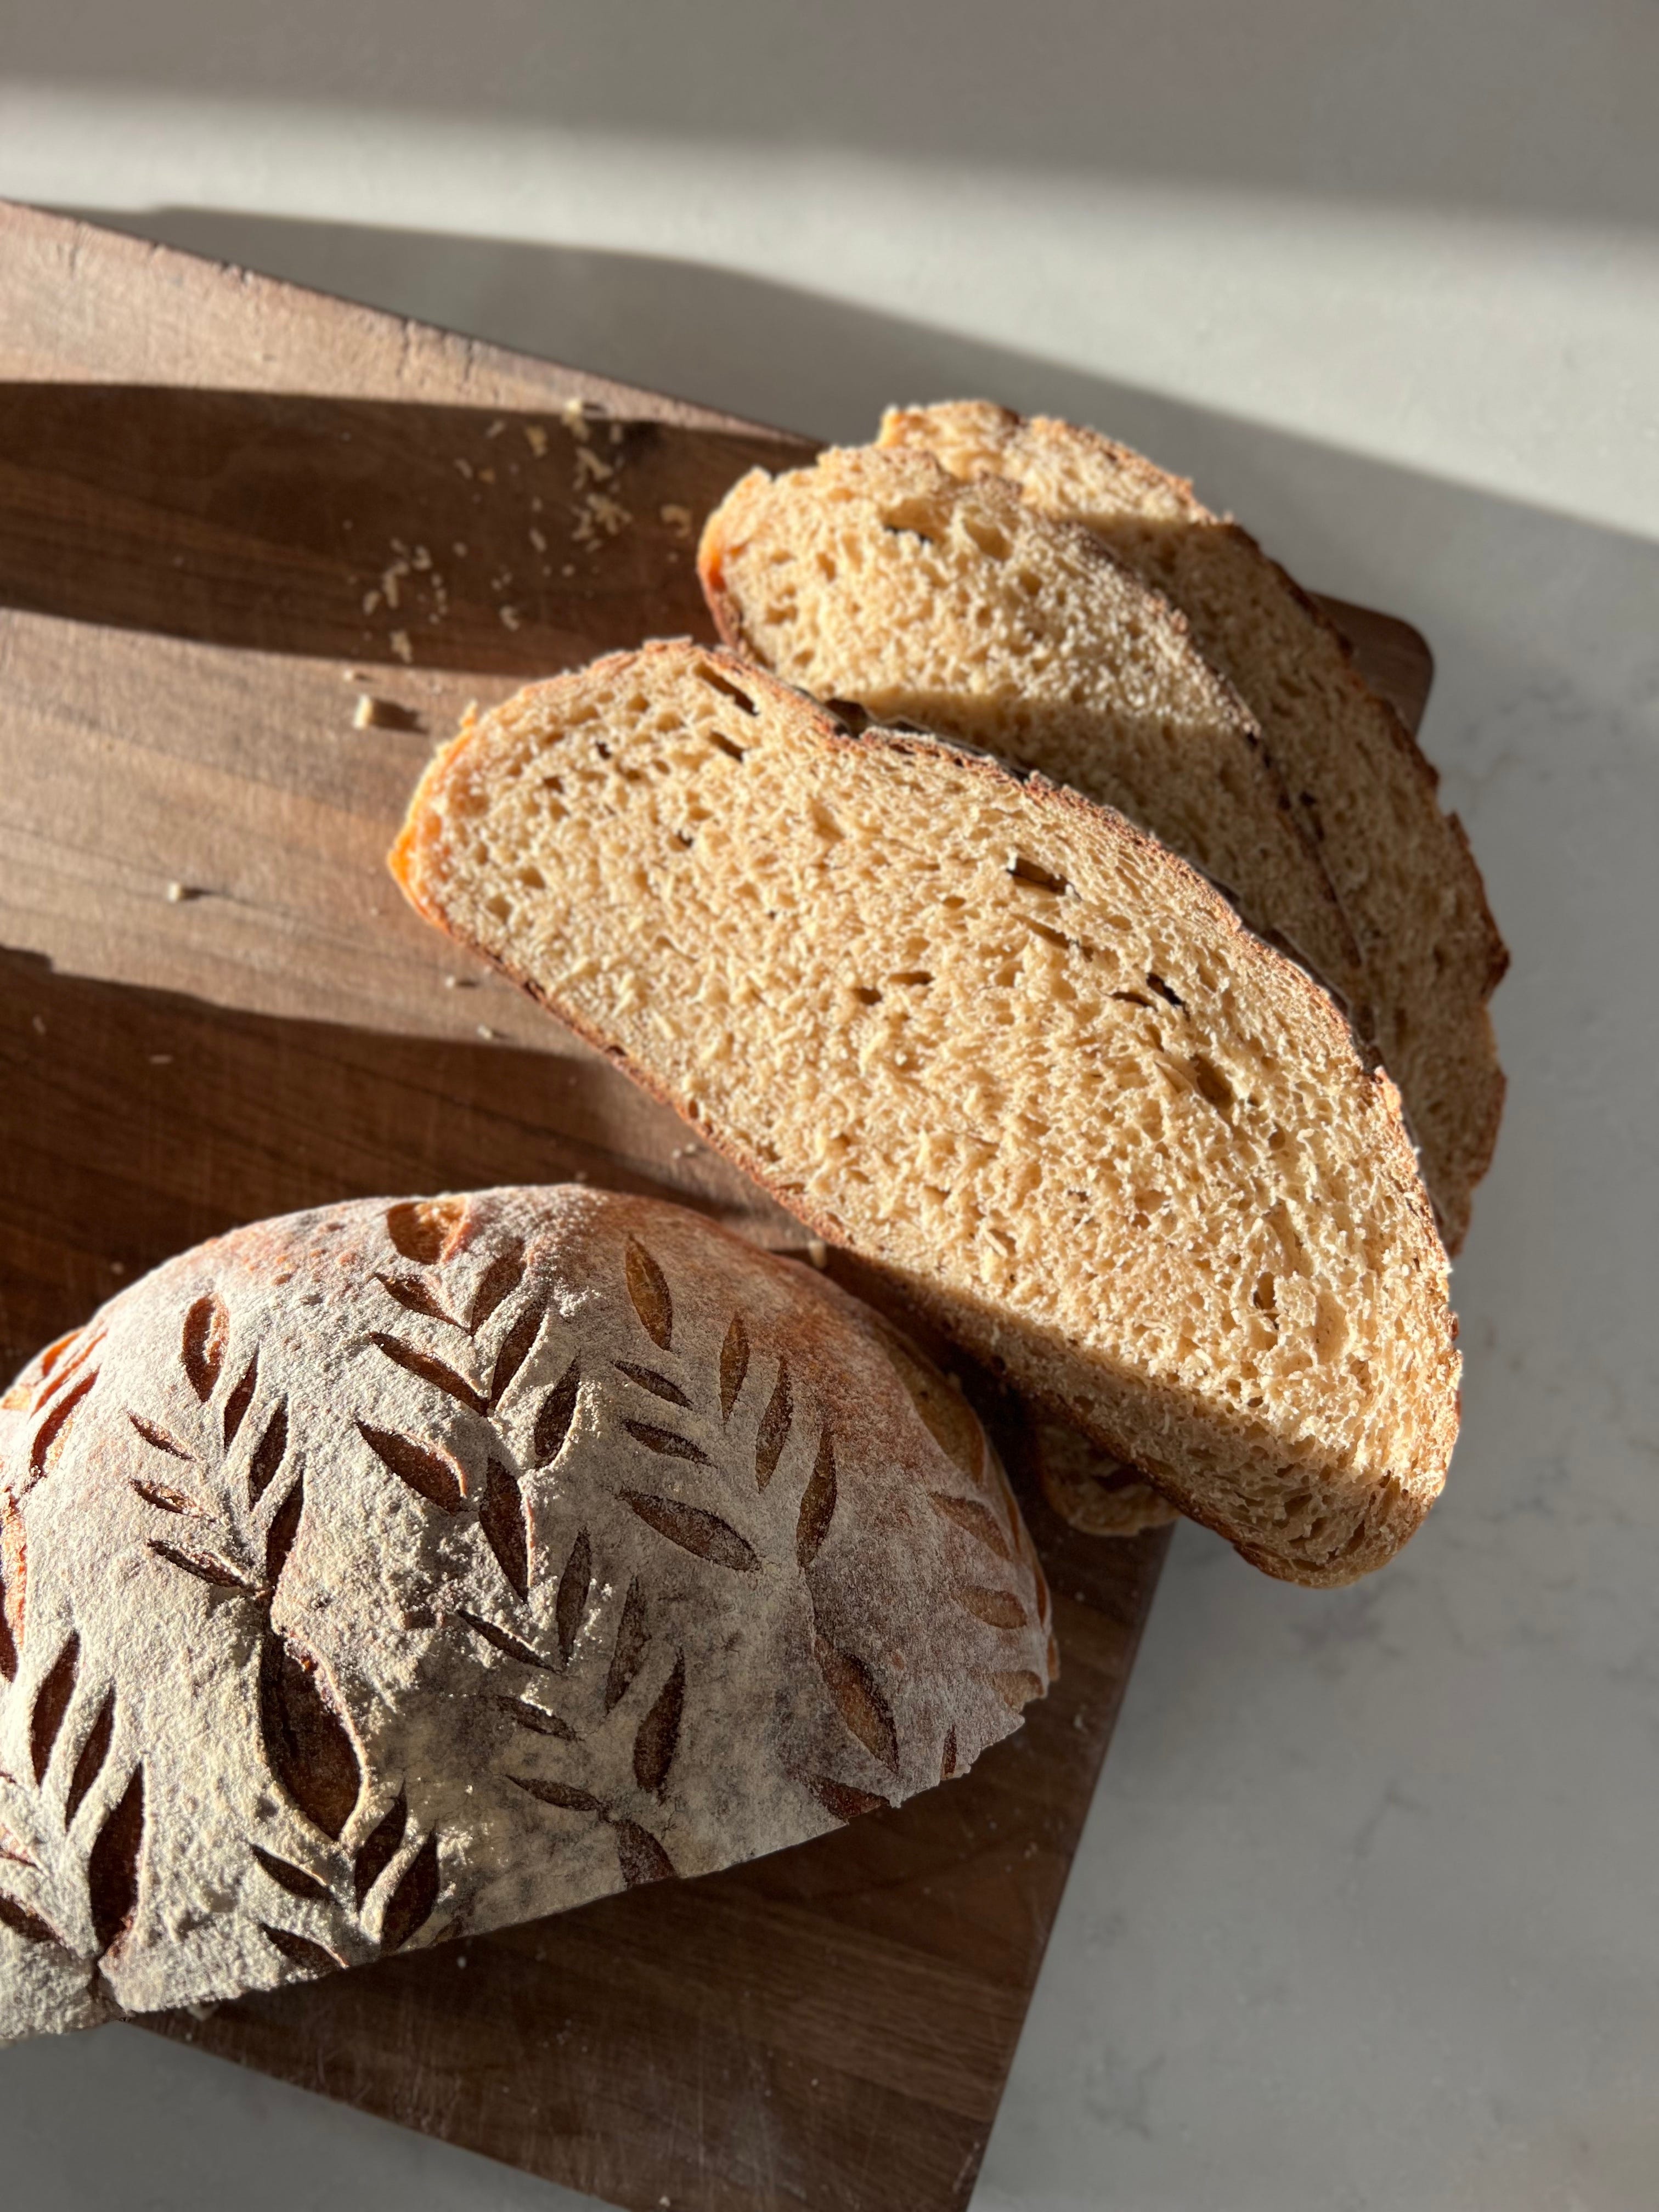
Freshly Milled Sourdough Table Loaf
Makes 1 loaf
TOOLS:
Mixing Bowl, Kitchen Scale, Dough Scraper, Proofing basket, Cotton or linen kitchen towel, Bowl Cover, Flexible razor for scoring, Parchment paper or The Bread Mat, Dutch Oven
Step 1: Feed Starter
10 grams starter
50 grams room temperature, filtered water
50 grams flour
Mix well and let sit at room temperature for 6-8 hours. Starter will have many bubbles and double in the jar when ready.
Step 2: Mix Dough
425 grams room temperature, filtered water (this is an 85% hydration loaf)
50 grams active sourdough starter
500 grams freshly milled hard white wheat - set your mill to the finest setting possible
25 grams honey
10 grams salt (salt is 2% of the flour measurement)
1. Combine all ingredients and mix/knead in the bowl for 10 minutes. Dough will be quite sticky but gluten strands will develop as you knead and the dough will become more elastic and smooth. Cover bowl and let sit 5-10 minutes to rest.
2. Uncover bowl, and turn out dough onto counter. Slap and fold on the counter for about 5 minutes. This is similar to stretching and folding on the countertop. Dough will become even more sticky the longer you knead. Using dough/bench scraper, gather dough into basic round and cover directly on counter with an upside down bowl. Let sit 5-10 minutes more.
3. Uncover dough and wipe your surface clean - you will need a large space for this step. A 4x4 square is sufficient. A dining table works well if your countertop space is not large. Sprinkle a small amount of water on your surface and spread with your hands. Stretch the dough out on your work space until very thin. Alternate sides as you gently stretch and lift the edges of the dough. allowing air to come under the dough as it stretches. Stretch it as thin as possible, without tearing, then fold the sides in, top to bottom in and roll. Place dough in bowl and cover.
Step 3: Bulk Fermentation
Let the dough sit, covered, at room temperature for 4-5 hours.
Do one set of coil folds following this demonstration:
Place lid back on bowl and let sit another 4 hours at room temperature.
This step is optional - especially if bulk fermentation is during the night, you wont be getting up at 2am to fold your dough!
Bulk fermentation time should be between 8-9 hours. Watch your dough and you will learn the timing cues of moving to the next step. Dough will expand by almost double, and have many bubbles on the edges of the dough. Lean towards a bulk ferment time of 8 hours in the summer, when temperatures are warmer and closer to 9 hours in fall/winter when temperatures are cooler.
Step 4: Final Shape
With wet hand or dough scraper, loosen the dough from around the edge of the bowl. Turn dough out onto un-floured counter top.
With your hand and the bench knife, gently rotate the dough, and shape into a round. Flour the top with a few sprinkles of flour
Flip the round over so that the floured top is on the counter.
Fold the bottom edge of the dough up 2/3 of the way, then fold both sides in to meet.
Fold the top edge of the down, towards you, and bring in loose edges gently.
Flip round over, seam side down, and with pinkies along the back edge of the dough, gently drag it towards you.
Gently place the dough in a well floured proofing basket (my favorite for fresh milled loaves is this one. You want a maximum 7” proofing basket for fresh milled loaves) and stitch up the bottom of the loaf, bringing the edges towards the center. If you are proofing in a 9 or 10 inch proofing basket, your loaf will not rise as high in the oven, because the dough will spread out to fill the basket during the cold proof.
3. Cover with cotton or linen kitchen towel, and bees wrap or bowl cover.
Refrigerate for 8-12 hours, with 12 hours being the maximum time your loaf proofs in the fridge.
Step 5: Bake
Take loaf out of the fridge and let come to room temperature for about an hour.
When ready to bake, preheat oven to 500°F with dutch oven on middle rack for 30 minutes
Turn the loaf out of the banneton onto a piece of parchment paper, cut parchment with scissors around the loaf, and flour top of loaf with bread flour. Score the loaf 1/4 to 1/2 inch deep with a razor. Either one swift score or decoratively with several small, shallow cuts.
CAREFULLY lift loaf (using parchment as “handles”) into hot dutch oven. (If your oven runs hot, you may want to reduce oven temperature 15 degrees or so). Set timer to 20 minutes and bake.
Remove lid, reduce heat by 15 degrees, and bake, uncovered, 12 to 15 minutes longer.
Remember dutch oven will be extremely hot.
-Use heat proof gloves when handling and after loaf has been baked.
-Keep the dutch oven and lid inside oven until it has cooled completely.
-If you find your loaves are getting too browned on top, you can do the full bake with the lid on.
As you all are my inner circle community, I would love to hear any feedback you have on this tutorial. If you try this recipe and run into a challenge, please let me know in the comments so we can connect and work through the process together.
Happy Baking! :)
Bread Storage
-A covered cake stand or dutch oven sitting on the countertop are my favorites for preserving the softness of the bread.
-Linen bread bags
-You can slice bread and freeze in a single layer on a cookie sheet, then transfer to plastic or reusable zip top bag for easy single serve slices that can be reheated in the toaster/toaster oven.
-If bread sits a few days and becomes stale, I like to cut into small cubes and place into a freezer bag, to be used for my favorite sourdough breakfast bake recipe.
Bakers Schedules + Resources
Sample Baking Schedule - AM Bake
10pm feed starter
11am mix bread (step 2)
11:30 bulk fermentation begins (step 3)
7:30/8pm final shape and cold proof (step 4)
7am preheat oven
7:30/8am bake loaf
Sample Schedule - PM Bake
10am-12pm (somewhere in that window) feed starter
9:30pm mix bread (step 2)
10:00pm bulk fermentation begins (step 3)
6:30am final shape and cold proof (step 4)
Between 3:30-5:30pm preheat oven
Bake loaf after oven has been preheating for at least 30 minutes
RESOURCES
MILL
GRAINS
SALT
Thank you for reading and supporting. I am so grateful for you!
I just ordered my first batch of wheat berries! I’m very excited to start milling and using a much more nutritious flour in my baking. Thank you for putting this together!